Introduction
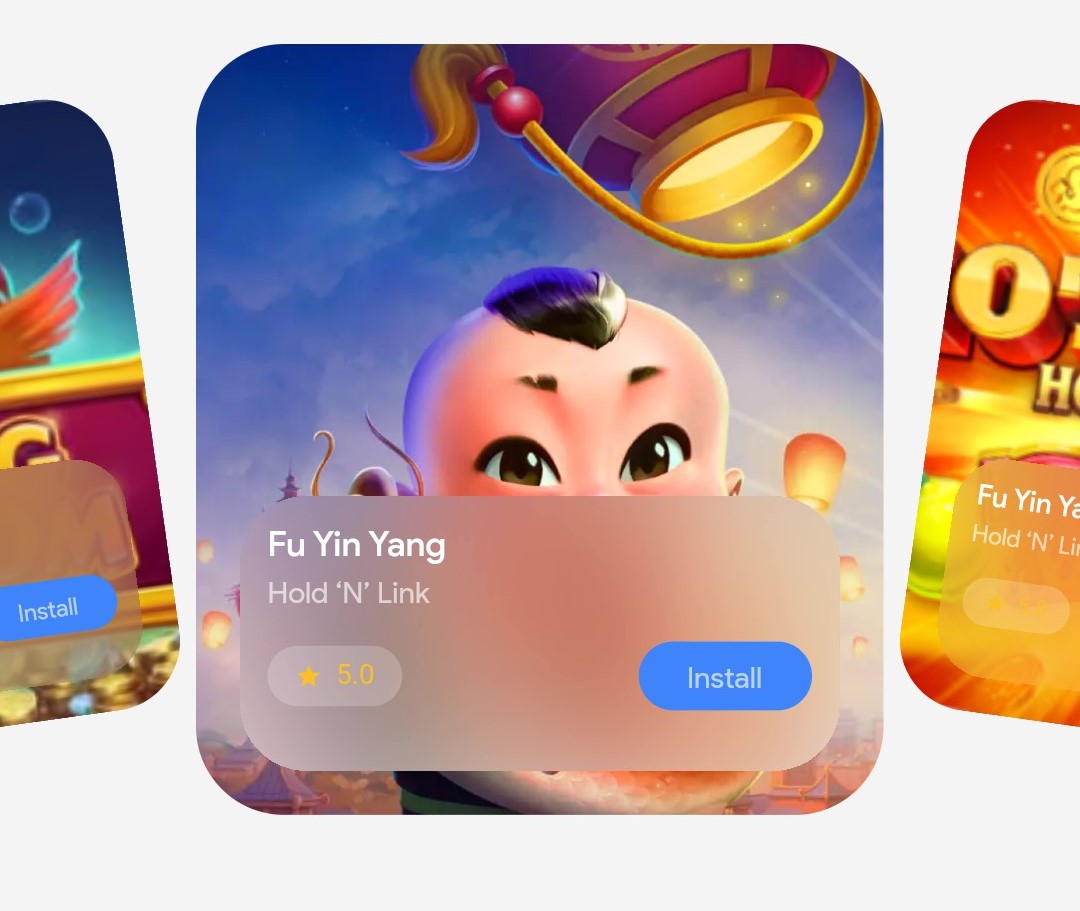
In this tutorial, we will learn how to add an awesome-looking horizontal listview animation to a Flutter app. We will use the carousel_animations package to make this process easier.
Dependencies
The first step is to add the carousel_animations package to our project. We can do this by opening the pubspec.yaml file and adding the following line to the dependencies section:
dependencies:
  carousel_animations: ^0.0.4
Creating the Carousel
Once the package is installed, we can start creating our carousel. We will use the following code:
Swiper(
  layout: SwiperLayout.CUSTOM,
  customLayoutOption:
      CustomLayoutOption(startIndex: -1, stateCount: 3)
        ..addRotate([-45.0 / 180, 0.0, 45.0 / 180])
        ..addTranslate([
          Offset(-370.0, -40.0),
          Offset(0.0, 0.0),
          Offset(370.0, -40.0)
        ]),
  itemWidth: 300.0,
  itemHeight: 200.0,
  itemBuilder: (context, index) {
    return Container(
      color: Colors.grey,
      child: Center(
        child: Text("$index"),
      ),
    );
  },
  itemCount: 10,
),
This code will create a carousel with three items. The items will be rotated and translated as they move across the screen.
Customizing the Animation
We can customize the animation by changing the values in the customLayoutOption object. For example, we can change the amount of rotation and translation by changing the values in the addRotate and addTranslate methods.
We can also change the size of the items by changing the values in the itemWidth and itemHeight properties.
Adding Images to the Carousel
We can add images to the carousel by changing the itemBuilder function to return a Image widget. For example, the following code will add an image to each item in the carousel:
itemBuilder: (context, index) {
  return Image.network(
    'https://fluttermobiledeveloper.com/wp-content/uploads/202305/img_rectangle3677.png',
  );
},
Full Code:
import 'package:carousel_animations/carousel_animations.dart';
import 'package:flutter/material.dart';

void main() {
  runApp(MyApp());
}

class MyApp extends StatelessWidget {
  @override
  Widget build(BuildContext context) {
    return MaterialApp(
      title: 'Carousel Animation',
      home: Home(),
    );
  }
}
class Home extends StatelessWidget {
  const Home({Key? key}) : super(key: key);

  final List<String> images = const [
    'https://fluttermobiledeveloper.com/wp-content/uploads/2023/05/img_rectangle3677.png',
    'https://fluttermobiledeveloper.com/wp-content/uploads/2023/05/img_rectangle3684_3.png',
    'https://fluttermobiledeveloper.com/wp-content/uploads/2023/05/img_rectangle3684_80x80.png'
  ];

  @override
  Widget build(BuildContext context) {
    return Scaffold(
      body: Column(children: [
        SizedBox(
          height: 200,
        ),
        Swiper(
          layout: SwiperLayout.CUSTOM,
          customLayoutOption: CustomLayoutOption(startIndex: -1, stateCount: 3)
            ..addScale([0.8, 1, 0.8], Alignment.center)
            ..addRotate([-25.0 / 180, 0.0, 25 / 180])
            ..addTranslate([
              Offset(-300.0, -40.0),
              Offset(0.0, 0.0),
              Offset(300.0, -40.0)
            ]),
          itemWidth: 250.0,
          itemHeight: 280.0,
          itemBuilder: (context, index) {
            return Image.network(
              images[index],
              fit: BoxFit.fill,
            );
          },
          itemCount: 3,
        ),
        SizedBox(
          height: 20,
        ),
      ]),
    );
  }
}
Below is the result.

Conclusion
In this tutorial, we learned how to add an awesome-looking horizontal listview animation to a Flutter app. We used the carousel_animations package to make this process easier. We also learned how to customize the animation and add images to the carousel.
Here are some additional tips for creating a stunning horizontal listview animation in Flutter:
- Use high-quality images. The images you use will have a big impact on the overall look and feel of your animation.
- Use a variety of animation effects. Don’t be afraid to experiment with different animation effects to create a unique look.
- Use a consistent design. The design of your animation should be consistent throughout. This will help to create a polished and professional look.
With a little creativity and effort, you can create stunning horizontal listview animations that will wow your users.


Leave a Reply